
TL;DR
Moving your rig into a closet dramatically reduces noise, but ventilation and placement are key. Effective acoustic treatment focuses on first reflection points and sealing gaps, not just wall coverage.
Imagine turning a noisy, high-powered AI rig into a whisper-quiet machine without sacrificing performance. Turns out, the best way to cut down noise isn’t with heaps of foam or fancy panels. It’s about where you put the rig—and how you treat the space around it.
If you’re setting up in a tiny closet or small room, you’re dealing with a balancing act: controlling sound reflections and heat while keeping your setup safe. This guide will show you how to position your gear, treat your space smartly, and avoid common pitfalls. Whether you want a silent workspace or a better recording booth, these tips make a difference.
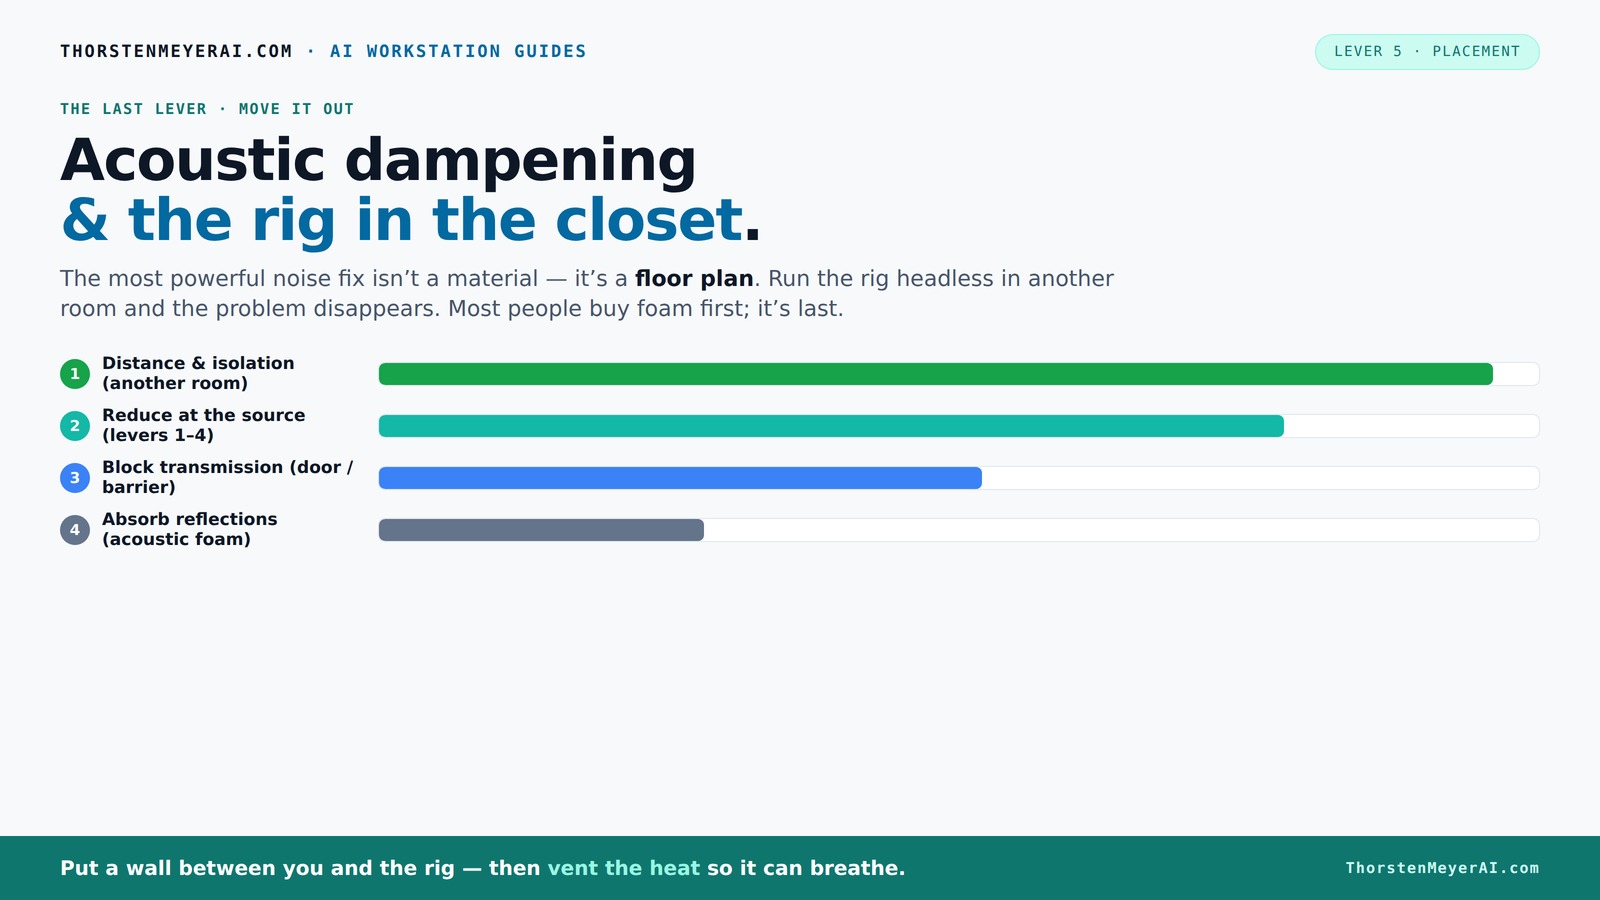
Acoustic dampening
& the rig in the closet.
The most powerful noise fix isn’t a material — it’s a floor plan. A rig you can’t hear because it’s in another room beats any amount of foam. Tap the approaches in Part 1 to see what actually works.
(another room)
(levers 1–4)
(door / barrier)
(acoustic foam)
Contain the noise, not the heat
Key Takeaways
- Moving your rig into another room or closet is the most effective noise reduction method, especially for AI workstations.
- Ventilation is critical; sealed spaces trap heat, risking damage or throttling. Use active airflow or soundproof cooling solutions.
- Treat the first reflection points—walls behind the mic, ceiling, and nearby surfaces—for the best sound quality.
- Foam and panels help with reflections but don’t block sound leakage. Seal gaps and treat the door for better isolation.
- Layer blankets and foam, leaving air gaps when possible, to boost absorption and reduce echo in small spaces.

36 Pack AUSLET Acoustic Panels 12 x 12 x 2 Inches, Pyramid Sound Proof Foam Panels for Wall, High Density Black Acoustic Foam Panels,Soundproof Wall Panels
- Enhances Audio Quality: Absorbs noise, echoes, and reverb
- Easy Rapid Expansion: Quickly expands to full size
- Unique Pyramid Design: Provides effective sound control
As an affiliate, we earn on qualifying purchases.
As an affiliate, we earn on qualifying purchases.
Why Your First Move Should Be Moving the Rig (Not Adding Foam)
The most effective way to quiet a loud machine? Put it somewhere else. Distance is king here. A rig in another room, or even a closet, is often silent to your ears—way more than any foam or panels could ever achieve.
Think about it: a GPU that hums at 70dB in your desk is barely audible if it’s in a closet on the other side of the house. You’re reducing noise at the source, which is always smarter than trying to absorb or block sound once it’s already in your space.
This approach works particularly well with AI setups, where you connect remotely via SSH or APIs. Your machine can roar away in a closet, while you work peacefully at your desk.
The 'Rig in the Closet' Setup — The One Big Caveat
Placing your rig inside a closet sounds perfect—less noise, less distraction. But here’s the catch: heat. A sealed closet traps heat like a greenhouse. That 600W GPU isn’t just creating noise; it’s cooking itself if the air can’t circulate.
Without proper ventilation, your rig will throttle or shut down. So, if you’re considering a closet setup, plan for airflow. You need vents, exhaust fans, or even a small duct system to let hot air escape.
Some companies make custom soundproof cabinets with built-in cooling, combining absorption and airflow. They’re pricier but worth it if you want silence and safety.
How to Treat a Closet for Good Sound Quality (No, Just Foam Isn’t Enough)
Acoustic dampening isn’t just about sticking foam on the walls. It’s about controlling the first points of reflection—those spots where sound bounces directly back to your mic or ears.
For a closet, focus on the wall behind the mic, nearby flat surfaces, and the ceiling. Use dense, thick panels—2 to 4 inches thick if possible—to absorb lower frequencies. Remember, foam alone won’t block sound leakage; it softens reflections inside the space.
Example: Hang a thick blanket with an air gap from the door and treat the wall behind your mic with foam or fiberglass panels. Cover the door with a moving blanket or sound sealant to prevent sound leaks.
Deeply understanding why these treatment points matter is crucial: reflections at these points can cause echo and muddiness, degrading audio clarity. Sealing gaps prevents sound from leaking out, which is especially important in small spaces where even minor leaks are noticeable. The tradeoff is that more treatment can reduce room liveliness but might also make the space sound 'dead' if overdone. Striking the right balance is key.
Placement Tips: Where to Put Foam, Blankets, and Panels in a Closet
Placement is everything. Start by identifying the primary sound paths: where your voice hits the wall, the ceiling, and the desk. Treat those first.
Attach foam panels at the first reflection points—these are typically behind and beside your microphone. Use a mirror trick: sit in front of your mic and have a buddy move a mirror along the walls. Wherever you see a reflection, treat that surface.
Layer blankets or panels with some air gap. Hanging a blanket a few inches from the wall increases absorption. For corners and low frequencies, add bass traps or foam wedges.
Don’t forget the door: seal gaps with weatherstripping or a heavy blanket. Treat the desk surface if it’s reflective—cover with a cloth or add a soft pad underneath.
Understanding why placement matters can’t be overstated: properly positioned treatments target the most problematic reflections, improving clarity and reducing echo. The use of mirror trick helps ensure you’re treating the right spots, and layering with gaps maximizes absorption, especially for mid and high frequencies. This strategic approach minimizes unnecessary treatment and optimizes space use.
DIY Closet Booths: Building Your Quiet Sanctuary
DIY solutions are everywhere on YouTube—layered blankets, hanging foam, corner traps. The key is layering and broad surface coverage. For a simple booth, hang thick blankets or moving pads around the walls, leaving a gap for airflow.
Pro tip: create a 'room within a room' by adding a free-standing frame covered in blankets or foam. This reduces reflections and isolates sound even more.
Many hobbyists use a combination of acoustic foam on critical reflection points and heavy blankets on the door and walls. This combo can cut noise levels by 20-30dB if done right [1][2][6].
Understanding the tradeoffs here is important: DIY booths are cost-effective but may not be perfectly sealed or ventilated. Proper layering and placement are critical to maximize noise reduction without trapping heat or causing unwanted echoes. You’ll need to balance sound isolation with airflow to prevent overheating, especially in small enclosures.
Latest Trends: Better Materials & Smarter Placement
New materials and smarter placement are changing DIY soundproofing. Heavy blankets, mineral-fiber panels, and damping compounds now compete with foam for affordability and effectiveness [3][5].
Experts recommend focusing on broad surface coverage—covering the entire wall behind the mic, ceiling, and door—before filling corners. This reduces standing waves and low-end buildup common in small rooms.
Also, advanced ventilation systems and ducted airflow are gaining popularity, making closet rigs safer and quieter in the long run.
Understanding these trends is vital because the right combination of materials and placement can drastically improve sound quality while maintaining safety and airflow. Overusing dense materials without proper ventilation can lead to heat buildup, so integrating smarter placement with effective cooling solutions is essential for a balanced setup.
Frequently Asked Questions
Is acoustic foam enough for a closet studio?
Not quite. Acoustic foam reduces echo and flutter echo inside the space but doesn’t stop sound from leaking out. To truly isolate, you need to seal gaps and treat reflection points, especially near the mic and door.
Where should I put the mic in a closet booth?
Position the mic at the first reflection point—typically slightly away from the wall behind you, facing a treated wall. Use a mirror trick to find these points easily. Keep the mic a few inches from reflective surfaces for clearer recordings.
Do I need bass traps in a tiny closet?
If you notice low-end buildup or a 'boomy' sound, adding bass traps in corners helps. For small spaces, dense foam or fiberglass panels at low frequency points make a big difference.
How much of the wall should I cover?
Cover the first reflection points and any parallel walls, especially near the mic. Aim for at least 20-30% coverage in critical areas, but broad coverage across the entire wall surface improves overall sound quality.
Should blankets work better with an air gap?
Yes. Hanging blankets a few inches from the wall increases absorption efficiency, especially for mid and high frequencies. Use hooks or a frame to create consistent gaps.
Conclusion
Quieting a rig in a closet isn’t just about stuffing it with foam. It’s about smart placement, proper ventilation, and treating the right reflection points. Done well, you get a silent workspace and a clean, professional sound for recordings or streaming.
Remember: the best noise solution is often distance—think of your closet as a secret weapon, not a trap. Your setup can be both powerful and peaceful if you treat it thoughtfully.